AVD Construction
The following web page presents various specifications and construction details for building AVD, mostly with compressed stabilised earth blocks.
First important detail: these blocks must have been well cured for 1 month and left for drying for 3 more months.
The reason is that earth blocks, even stabilised ones, always shrink because of clay in the soil. This time period is essential to allow the blocks to shrink fully. If this requirement is not followed and the blocks are used too early, they will shrink in the vaulted structures. Thus they will create tension in the masonry and the latter will crack.
One should know that arches always tend to crack, even if they are well built. The reason is that the arch has a different behaviour than the masonry above it, and the line of thrust changes when the arch is loaded.
Compressed stabilised earth blocks used for building AVD should have a very accurate and regular thickness. The Auram Press 3000 allows accuracy within 0.5 mm for the block thickness, from corner to corner and from block to block. It is essential to control regularly their thickness during the production process.
The following pages try to explain how to build various types of AVD, but one should understand that nothing replaces hands-on experience and the acquisition of technical gestures through a proper training course.
NUBIAN TECHNIQUE
| This technique came from Nubia, from Southern Egypt, hence the name Nubian. It has been used since ages, as it is testified by the vaults of the granaries of the Ramasseum, Egypt, which was built by Ramses II around 1300 BC. The Nubian technique was revived and disseminated by the Egyptian architect Hassan Fathy. We owe him thanks for the worldwide renaissance, in the 20th century, of earthen architecture and construction with arches, vaults and domes. CRATerre - the International Centre for Earth Construction, and the Auroville Earth Institute inherited his spirit and commitment towards the earth as a building material and what the latter can do for people. The Nubian technique traditionally needs a back wall to stick the blocks onto. The vault was built arch after arch and therefore the courses were laid almost vertically. The binder, about 1-1.5 cm thick, was the silty-clayey soil from the Nile and the blocks used were adobes, the sun dried bricks. The unevenness of the adobes made it necessary to slightly incline the courses, so as to increase the adhesion by force of gravity. |   Hassan Fathy |
 1. Shaping the curve onto the adobe wall |  2. Adjusting the curve |
 3. Starting the vault |  4. Starting the inclined course | 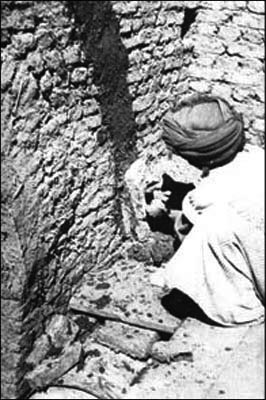 5. First course |
 6. Second course |  7. Applying some mortar |  8. Third course |
 9. Fourth course |  10. The first arch is completed Photos: Courtesy Hassan Fathy |  11. Building arch after arch |
The basis of this technique is that the blocks adhere to each other with earth glue. The principle is that the dry block sucks by capillarity the water along with the clay of the glue which will bind the blocks. It is essential that the blocks are very thin, so as to have a high ratio “sticking area/weight”: the larger the area of the block is and the thinner the block is, the better will be the adhesion.
The Nubian technique was also used for building circular domes, using a compass, as is shown hereafter. This technique has the advantage of allowing one to build vaults and domes without centring. This technique with vertical courses has a major disadvantage, which is that the earth glue is very liquid and the blocks are very thin. Therefore the shrinkage of the glue is important and it induces cracks, especially in vaults.
When compressed stabilised earth blocks are used to build vaults using this technique, the course can be absolutely vertical as it is not needed any more to incline the courses for the adhesion. The even regularity of CSEB produced by the Auram press 3000 allows building with a cement-stabilised earth glue of only 1-2 mm in thickness. The Nubian technique has been developed by the Auroville Earth Institute to build other types of vaults, such cloister and groined domes, and has evolved towards the Free Spanning technique.
FREE SPANNING TECHNIQUE
The free spanning technique is an ongoing development of the Nubian technique that the Auroville earth Institute is working on since a few years. It allows courses to be laid horizontally.
This technique combines also the use of vertical courses, like in the Nubian technique. Depending on the shape of vaults, structures are built either with horizontal courses, vertical ones or a combination of both.
This technique combines also the use of vertical courses, like in the Nubian technique. Depending on the shape of vaults, structures are built either with horizontal courses, vertical ones or a combination of both.
| The basis of the technique with horizontal courses is not anymore the adhesion of the blocks by the earth glue, but the equilibrium of gravity forces of the various courses, and their transfer onto the next courses and the masonry in general. |  The vault rises with horizontal courses |  Building a semicircular vault of 6m span |
| It is essential to study the location of the centres of gravity so that the weight of the masonry never goes beyond the springers. It is needed also to develop a certain sense of how the forces behave in the masonry. The transfer of loads always takes the shape of catenary curves, and assumes the most direct way. |  Limit of stability of the horizontal courses | Load transfer in the shape of a catenary in an equilateral vault with a half dome |
 Force as a rampant arch |  Equilibrium of forces |  Force as a rampant arch |
 Limit of stability of the curved corbel |  Starting horizontal steps |  |
| The vault, being built with horizontal courses, rises like a corbel which is curved and has courses inclined at the same angle as the radius of the curve. .The photo beside shows the curved corbel of the left side of a 6 m span semicircular vault. It is here at the maximum height, and thus the limit of stability. | This photo shows the maximum height of horizontal courses which can be built the full length of the 6m span semicircular vault. Four more courses can be built horizontally by steps, as a rampant arch creates itself in the masonry. | Now, the courses are too inclined. The 6m span semicircular vault cannot be built horizontally anymore, as no force can balance the gravity forces. The construction has to go on with vertical courses. |
 Equilateral vault with horizontal courses The horizontal courses of the 3.60 m span equilateral vault have reached their maximum height. Courses should now be laid by steps. | Horizontal courses by steps The masonry goes on with horizontal steps, as the load transfer passes into the half dome which is at the end. | Forces through the keystone The forces pass through the keystone of the equilateral vault. |
The Free Spanning technique with horizontal courses presents an advantage compared to the Nubian technique: the glue is sandier and the quantity of glue is proportionally less, as the blocks are bigger. Therefore, the vault tends to crack less because there is less shrinkage due to the glue.
Very flat segmental vaults and certain shapes of vaulted structures (i.e. groined domes) cannot be built with horizontal courses. The reason is that gravity forces cannot be balanced by the forces of the load transfer which assume the shape of catenary arches. Therefore, the Free Spanning technique shows its full possibilities with a combination of horizontal and vertical courses. This technique is the most efficient method to build vaulted structures which have been studied with the optimisation method.
Very flat segmental vaults and certain shapes of vaulted structures (i.e. groined domes) cannot be built with horizontal courses. The reason is that gravity forces cannot be balanced by the forces of the load transfer which assume the shape of catenary arches. Therefore, the Free Spanning technique shows its full possibilities with a combination of horizontal and vertical courses. This technique is the most efficient method to build vaulted structures which have been studied with the optimisation method.
BINDER QUALITY
Soil identification
The binders are made of stabilised earth. It is essential to identify the soil quality in order to define the binder specifications. Easy soil identification can be done with the preparation of sample tests for the mortar. The specifications for wall masonry should be defined first.
• Three principles for stabilised earth mortar of walls
- Stabilise 1.5 times more than for CSEB, so as to get the same strength as the CSEB.
- Add coarse sand (0.2 to 2 mm) to reduce the shrinkage when drying.
- Prepare a plastic mix rather dry: it must not be too wet.
• Conducting tests for stabilised earth mortar of walls
- Stabilize with 7.5 % of cement, which is about: 1 cement: 4 soil: 8 sand (by volume)
- Apply a layer of 1 cm of mortar on a cured block which has been soaked first into water.
- Cure the mortar on the block for 3 days and then let it dry for 3 days (not on direct sun).
- No crack should appear and the mortar should not be crumbly.
- If cracks occur: the soil is too clayey. The soil/sand ratio should be decreased. Redo the test with the following mix: 1 cement: 3 soil: 9 sand.
- If the mortar is too crumbly, the soil is too sandy: the soil/sand ratio should be increased.
Redo the test with the following mix: 1 cement: 5 soil: 7 sand. If the sample is still crumbly, increase again the soil/sand ratio to 1 cement: 6 soil: 6 sand or more.
- Once the mortar for walls is satisfactory, the following specifications can be given for AVD.
Arches
The binder for arches is a mortar which should be sandier than the one for walls, in order to reduce the shrinkage once it dries. Note that soil and sand should be sieved with 1 mm mesh.
• If the mortar for walls (1 cement: 4 soil: 8 sand) gives satisfactory results, the same mix can successfully be used for arches: 1 cement: 4 soil: 8 sand.
• If the mortar for walls is 1 cement: 3 soil: 9 sand, meaning that the soil is too clayey, the specification for arches should be 1 cement: 3 soil: 9 sand or, if needed, less soil and more sand.
• If the mortar for walls is 1 cement: 7 soil: 5 sand, meaning that the soil is too sandy, the specification for arches should be 1cement: 9 soil: 3 sand or, if needed, more soil and less sand.
The fluidity of the mortar varies with the type of arch:
• Semicircular or pointed arches need a fluid mortar: add water compared to the mortar for walls.
• Segmental arches need two fluidities for the mortar. The same mortar is prepared in 2 pans:
- One mortar is very liquid. It is like glue and is used for the bottom part of the joint.
- The other mortar is much dryer. It is used to fill very tightly the upper part of the joint.
Note that this dryer mortar is used once the arch has been completed and before removing the centring. This mortar is pressed down with a rod laid horizontally, so as to get it very tight.
• Remember that the blocks must touch at the intrados. Therefore, it is essential that the mortar joint has a triangular shape and no thickness at the intrados edge of the blocks.
Vaults and domes built with the Nubian technique
The binder for vaults and domes is like glue and should be more clayey than the one for walls in order to stick the blocks properly against each other. Nevertheless, this glue should not be too clayey, as it should not have an excessive shrinkage, which will induce a lot of cracks in the structure later on. Note that soil and sand should be sieved with 1 mm mesh.
• If the mortar for walls (1 cement: 4 soil: 8 sand) gives satisfactory results, the following mix can successfully be used for vaults and domes: 1 cement: 6 soil: 3 sand.
• If the mortar for walls is 1 cement: 3 soil: 9 sand, meaning that the soil is too clayey, the specification for vaults and domes could be 1 cement: 5 soil: 4 sand or, if needed, less soil and more sand.
• If the mortar for walls is 1 cement: 7 soil: 5 sand, meaning that the soil is too sandy, the specification for vaults and domes could be 1 cement: 7 soil: 2 sand or, if needed, more soil and less sand.
• If the soil is too sandy, no sand should be added and the mix could be 1 cement: 9 soil.
• If the soil is really too sandy and the mix 1 cement: 9 soil does not give good results, the cement/soil ratio could be increased to 1cement: 8 soil or 1cement: 7 soil, or even more.
The fluidity of the glue is essential for the adhesion. The fluidity and thickness of the glue varies according to the work:
| Vaults, cloister and groined domes - Fluidity: The glue needs to be very liquid. A sample of the glue taken with the trowel should leave a film of 3-4 mm thick on a trowel placed vertically - Thickness: The vertical joint, which is binding the various courses of the vault, should be the minimum thickness. The best would be 1 mm thick and the maximum should be 2 mm thick. | Circular domes (Hemispherical, pointed and segmental) - Fluidity: The glue needs semi liquid like paste. A sample of the glue taken with the trowel should leave a film of 7-8 mm thick on a trowel placed vertically. - Thickness: The corners of the blocks are touching each other at the intrados edge. As the courses are circular, the side of the joint facing the intrados has a triangular shape, which has changing proportions when the dome rises. It is crucial that the intrados corners of the block touch each other. |
 3-4 mm left on the trowel |  7-8 mm left on the trowel |
Vaults built with the free spanning technique
The Free Spanning technique, which uses horizontal courses, is specially developed for building vaults without support. The binder is like glue. Note that soil and sand should be sieved with a 1 mm mesh. The mortar specifications vary as the vault rises:
• The first courses, which are quite flat, need a glue sandier than the one for walls, in order to reduce the shrinkage when drying.
• When the courses rise, their angle becomes steeper from the horizontal. Therefore, the blocks tend to slip down and fall. The glue should have more soil, in order to increase the ratio soil/sand.
First courses of the vault
• If the mortar for walls (1 cement: 4 soil: 8 sand) gives satisfactory results, the first courses of the vaults, which is built with horizontal courses, can use this glue: 1 cement: 4 soil: 8 sand.
• If the mortar for walls is 1 cement: 5 soil: 7 sand, meaning that the soil is too clayey, the first courses of the vaults, which is built with horizontal,
can use this glue: 1 cement: 3 soil: 9 sand or less soil and more sand, if needed.
• If the mortar for walls is 1 cement: 7 soil: 5 sand, meaning that the soil is too sandy, the first courses of the vaults, which is built with horizontal courses,
can use this glue: 1 cement: 9 soil: 3 sand or more soil and less sand, if needed.
Higher courses of the vault
The fluidity of the glue is essential when laying the blocks. It should have the same fluidity as for the vaults built with the Nubian Technique.
• When the courses get steeper and that the blocks start to slip down, the glue should become more clayey. Add progressively some soil to the glue and reduce of the same proportion the sand content.
• If the first courses uses a mix of 1 cement: 4 soil: 8 sand, the glue can be modified as such: 1 cement: 5 soil: 7 sand, or more soil and less sand if needed.
• When the courses rise further and have a steeper angle, the soil/sand ratio should be increased progressively.
The glue will have at the end the same specification as the one for vaults with the Nubian technique: 1 cement: 6 soil: 3 sand or more soil and less sand, if needed.
Filling steps between courses
The extrados of an optimized vault, built with horizontal courses, has steps which should be filled with an earth concrete.
• If the mortar for walls (1 cement: 4 soil: 8 sand) gives satisfactory results, the mix for the earth concrete can successfully be 1 cement: 2 soil: 3 sand: 4 gravel (1/2” size)
Note for all specifications concerning binders:• The first courses, which are quite flat, need a glue sandier than the one for walls, in order to reduce the shrinkage when drying.
• When the courses rise, their angle becomes steeper from the horizontal. Therefore, the blocks tend to slip down and fall. The glue should have more soil, in order to increase the ratio soil/sand.
First courses of the vault
• If the mortar for walls (1 cement: 4 soil: 8 sand) gives satisfactory results, the first courses of the vaults, which is built with horizontal courses, can use this glue: 1 cement: 4 soil: 8 sand.
• If the mortar for walls is 1 cement: 5 soil: 7 sand, meaning that the soil is too clayey, the first courses of the vaults, which is built with horizontal,
can use this glue: 1 cement: 3 soil: 9 sand or less soil and more sand, if needed.
• If the mortar for walls is 1 cement: 7 soil: 5 sand, meaning that the soil is too sandy, the first courses of the vaults, which is built with horizontal courses,
can use this glue: 1 cement: 9 soil: 3 sand or more soil and less sand, if needed.
Higher courses of the vault
The fluidity of the glue is essential when laying the blocks. It should have the same fluidity as for the vaults built with the Nubian Technique.
• When the courses get steeper and that the blocks start to slip down, the glue should become more clayey. Add progressively some soil to the glue and reduce of the same proportion the sand content.
• If the first courses uses a mix of 1 cement: 4 soil: 8 sand, the glue can be modified as such: 1 cement: 5 soil: 7 sand, or more soil and less sand if needed.
• When the courses rise further and have a steeper angle, the soil/sand ratio should be increased progressively.
The glue will have at the end the same specification as the one for vaults with the Nubian technique: 1 cement: 6 soil: 3 sand or more soil and less sand, if needed.
Filling steps between courses
The extrados of an optimized vault, built with horizontal courses, has steps which should be filled with an earth concrete.
• If the mortar for walls (1 cement: 4 soil: 8 sand) gives satisfactory results, the mix for the earth concrete can successfully be 1 cement: 2 soil: 3 sand: 4 gravel (1/2” size)
Types of soil are as different as human beings. Therefore, the various mixes which have been specified here are merely indicative and need to be adapted to suit each individual soil.
BUILDING ARCHES
Arches usually need a centring to be built. They may have any shape and span, but the blocks need a support for being laid. The main exception is corbelled arches.
Centrings can be made of wood, steel or masonry. Wood and steel centrings are useful when the same arch has to be built several times. Masonry centrings are often used to save the cost of a prefabricated centring, as their cost is mostly the labour which made it.
Wooden and steel centrings can have supports made of wood poles or steel pipes only if the arch has to be built many times. Most of the time, the supports are made with brickwork which is laid with a mortar made of earth and sand.
Types of centrings
 Wooden centring, ~ 5 m span |  Steel centring, 90 cm span |  Masonry centring, ~ 80 cm span |
Common procedure for all arches
It is essential that the blocks touch each other at the intrados. No mortar is in between the blocks inside, and outside the joint thickness will depend on the curvature of the arch. It is essential that the arch rises with the blocks perpendicular to the centring, so as to get the last blocks parallel near the apex. Extreme care must be taken over the decentring. The centring should go down slowly and vertically. 1. Slide the block laterally |  2. Check the right angle |  3. Build the arch symmetrically |
 4. Triangular joint of the mortar |  5. Pressing the mortar joint |  6. Removing wedges and decentring |
| Segmental arches Depending on the flatness of the arch the procedure will be different. For arches which are not too flat, the blocks are laid on the side of the centring in a similar way to that described above. The last blocks laid on top of the centring are laid according to the details mentioned hereafter for very flat segmental arches.  Roundness of segmental arches | Corbelled arches built without centring Corbelled arches were developed because they can be built without support, by corbelling regularly the horizontal courses of the wall masonry. The bond pattern is essential and the blocks should cantilever preferably by 1/4 of the block module with the maximum projection 1/3. For building such an arch, it is essential to pay attention to the balance of the masonry when courses rise. One should evaluate, before the masonry starts to tilt, where the centre of gravity is of the arch being built. It should not go beyond the limit of stability, which is the inner side of the pier. |
 Centre of gravity of a corbelled arch |
Arches built with the free spanning technique
A “curved arch” is normally never built free spanning, as it needs a support for the voussoirs. The following method was developed to build an arch without centring, so as to close a vault which was built with the Nubian technique and started at both ends of a room.
The Nubian technique needs a back wall to start sticking the vertical courses onto and the vault is built arch after arch. At the other end it is nearly impossible to lay the last course between the vault and the opposite wall.
This technique was developed to start building the vault on both opposite walls at the same time. It presents the advantage of going faster, as more masons can work on the same structure. As both halves of the vault get closer to each other, there will finally be a gap between both, which has to be closed. The method presented hereafter allows bridging without support for this gap between both halves of the vault.
 1. Start the vault on both sides |  2. Check the linearity of the last course |  3. Grind a block to adjust its length |
 4. Apply 2-3 mm of glue on the block |  5. Insert the block. Note the mortar on the sides |  6. Adjust the block by sliding it vertically |
 7. Wedge the block with stone chips |  8. Grind the keystone to adjust its thickness |  9. Pour water on the keystone |
 10. Insert the keystone after applying glue |  11. Hit gently to get the keystone to wedge it |  12. Wedge the keystone with stone chips |
BUILDING VAULTS
Building a vault with the Nubian technique
| The back wall should be built first. It can have exactly the shape of the extrados of the vault or it can be quadrangular and the extrados of the vault will be drawn onto it. A template is needed to ensure the shape of the vault. It can advantageously be the future window frame on which are temporarily fixed some spacers to get the extrados shape of the vault. The template can also be made of welded Tor steel, which can be re-used afterwards for reinforced cement concrete. It is necessary to create a net of string lines between the back wall and the template. Note that it is better to lay the net of string lines outside in the masonry. The reason is that any mistake in accuracy, with a block laid lower or slipping down, will not change the linearity of the string line. In certain cases, it is sometimes necessary to lay the string lines below the masonry. It is then indispensable to work with a very high accuracy and to leave always 1 mm gap between the blocks and the string line. |  Back wall  Window frame as a template |
Building a vault with the free spanning technique
BUILDING DOMES
Circular domes
Square domes
We saw that this technique allows one to the lay courses horizontally and that it also uses vertical ones, like in the Nubian technique. What is presented here is only the particular details for laying the courses horizontally. The binder varies when the vault rises. It starts with the same specification as for arches and progressively become more clayey. It is essential to check the balance of the portion of the vault which progressively corbels. Therefore, to ensure the height of the various courses their cord and span must be checked, to see if they are according to the calculations. It is essential to compress the vertical joint very well and to keep it to the minimum, so as to reduce the shrinkage of the glue and cracks in the vault later on. |  Compress the joint |
BUILDING DOMES
Circular domes
| Circular domes are defined by the rotation of a compass. The length of the compass is taken at the outer diameter of the dome, so that the direction of the block can be adjusted by the angle of the compass. The control of the shape is ensured from the inner diameter and thus a cursor or any kind of mark made on the compass is needed. |  Compass |  Triangular shape of the mortar (section) |  Triangular shape of the joint (inside) |
Square domes
Square domes are generated by the intersection of two vaults, which create the groined or cloister domes. The procedure described as follows is for cloister domes which are built with squinches. A template is required and it is generally made of a pipe which is bent according to the need. String lines are pulled at regular intervals, from diagonal to diagonal of the template.
 Pipe template and string lines |  Hearing bones of the joints, when the squinches meet at the centre |  Cross alternately the blocks for the keystones Right side cover |  Cross alternately the blocks for the keystones Left side cover |